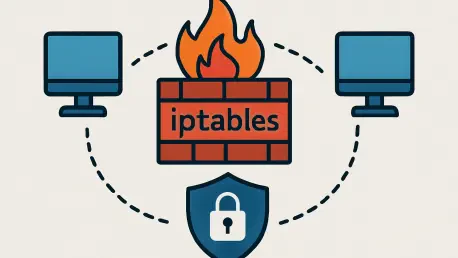

Imagine a bustling digital highway where countless data packets zoom past every second, each carrying critical information to and from your system, and in this chaotic environment, a single malicious packet could wreak havoc, compromising sensitive data or disrupting operations. This is where IPTables emerges as a vital gatekeeper, standing guard to filter and control the flow of network traffic. As a cornerstone of Linux-based network security, IPTables empowers administrators to dictate which packets are allowed or denied, safeguarding systems from an array of cyber threats.
The significance of such control cannot be overstated in an era where internet vulnerabilities are exploited with increasing sophistication, and protecting digital assets has become paramount. From blocking unauthorized access to mitigating denial-of-service attacks, IPTables provides a robust framework for crafting precise security policies. This guide aims to demystify IPTables, breaking down its core functionalities and demonstrating its power through practical, hands-on examples using virtual machine setups.
By the end of this journey, readers will gain a solid understanding of packet filtering principles, learn to create effective security rules, and witness IPTables in action through detailed demonstrations. Whether managing a personal server or a corporate network, these insights will equip anyone with the tools to enhance their digital defenses and navigate the complexities of modern network security.
The Evolution of Network Security in Linux: Why IPTables Matters
Network security in Linux has undergone a significant transformation since the early days of the internet, when systems operated with minimal barriers to data exchange. Initial tools provided basic connectivity, enabling remote access and data sharing, but lacked the sophistication to address emerging threats. As cyber risks such as worms, viruses, and IP spoofing grew, the demand for advanced protective mechanisms became undeniable, paving the way for more robust solutions.
Early attempts at securing Linux networks relied on tools like ipfwadm, which offered rudimentary packet filtering but struggled with limitations such as the absence of stateful inspection. This meant manual configuration was needed to allow inbound responses to outbound traffic, a cumbersome and error-prone process. The subsequent introduction of ipchains brought improvements like flexible rule matching and basic connection tracking, yet it still fell short of full stateful capabilities and scalability for complex rule sets, especially with the rise of IPv6.
The advent of NetFilter marked a turning point, providing a kernel-level framework with strategic hook points—PREROUTING, INPUT, FORWARD, OUTPUT, and POSTROUTING—that allowed for dynamic packet interception and manipulation. Built on this foundation, IPTables emerged as a powerful user-space tool, enabling administrators to implement firewalls, perform Network Address Translation (NAT), and manage traffic with precision. Its ability to handle diverse security needs, from blocking malicious packets to facilitating NAT for IP address conservation, solidified IPTables as an indispensable asset in the arsenal of network professionals.
Mastering IPTables: Core Concepts and Structures
Before diving into practical applications, a clear grasp of IPTables’ foundational elements is essential for effective implementation. This section dissects the architecture of IPTables, focusing on its primary components that orchestrate how network packets are processed. Understanding these building blocks ensures that rules are crafted with purpose and clarity.
The system’s design hinges on a structured approach to managing network functions, allowing for both simplicity and flexibility in handling various tasks. From filtering unwanted traffic to modifying packet headers, IPTables organizes these operations into logical categories. This segmentation is critical for maintaining order as rules grow in complexity.
A deep dive into these components reveals how packets navigate through predefined pathways and user-defined logic, offering critical insights into network management. By mastering these concepts, administrators can tailor security policies to meet specific needs, ensuring robust protection against evolving threats. This groundwork sets the stage for the practical demonstrations that follow.
Understanding Tables: Organizing Network Functions
IPTables categorizes its operations into distinct tables, each dedicated to a specific type of packet processing. The Filter table, which serves as the default, focuses on deciding whether to allow or deny traffic based on defined criteria. Meanwhile, the NAT table handles Network Address Translation tasks, such as port forwarding and source address mapping, which are essential for managing IP address shortages.
Another critical table, Mangle, is tasked with packet modification, enabling adjustments to Quality of Service parameters, Time to Live values, and other packet attributes. This separation of functions ensures that each aspect of network management is addressed independently, preventing overlap and enhancing clarity. Below is a summary of these tables and their purposes:
- Filter: Packet filtering for allowing or denying traffic.
- NAT: Network Address Translation for port forwarding and address mapping.
- Mangle: Packet modification for QoS, TTL adjustments, and marking.
This organization allows for targeted rule application, ensuring that packets are processed according to their intended function. Such a structure is particularly beneficial when troubleshooting or scaling security policies, as it isolates different types of operations. Administrators can thus focus on specific areas without impacting unrelated configurations.
Navigating Chains: The Path of Packet Processing
Within each table, IPTables employs chains to sequentially process rules as packets traverse the system. Chains act as ordered lists where each rule is evaluated until a match is found, determining the packet’s fate through actions like ACCEPT, DROP, or REJECT. Key built-in chains include INPUT for incoming packets destined for the local system, OUTPUT for locally generated outgoing traffic, and FORWARD for packets routed through the system.
The sequential nature of chains ensures that packets are subjected to a logical flow of checks, with each rule potentially altering the outcome based on criteria such as source IP or protocol. If no rule matches, the chain’s default policy—often set to ACCEPT or DROP—takes effect. This methodical approach allows for granular control over network traffic, which is essential in high-stakes environments.
Beyond built-in chains, the flexibility to create custom chains offers a way to modularize complex rule sets. By directing packets to user-defined chains using the JUMP target, administrators can streamline rule management and enhance readability. This capability proves invaluable when dealing with intricate security requirements, as explored in upcoming sections.
Built-in Chains: Default Pathways
Built-in chains form the backbone of IPTables’ packet processing framework, each serving a distinct role in traffic management. The INPUT chain specifically handles packets intended for the local machine, making it crucial for protecting services running on the system. Rules in this chain can block malicious incoming requests or allow trusted connections.
The OUTPUT chain, conversely, governs packets originating from the local system, ensuring that outbound traffic adheres to security policies. Meanwhile, the FORWARD chain manages packets passing through the system, a common scenario in routers or gateways. These predefined pathways provide a standardized structure for applying rules across various network scenarios.
Understanding the purpose of each built-in chain is fundamental to crafting effective security measures, and recognizing the specific role of rules in the FORWARD chain is crucial when configuring a system as a firewall for other devices. This clarity in function allows for precise rule placement, ensuring that traffic is filtered at the appropriate stage of processing.
Custom Chains: Tailoring Security Logic
Custom chains introduce an additional layer of flexibility, enabling administrators to create tailored rule sets for specific purposes. By defining a new chain, rules can be grouped logically, reducing clutter in built-in chains and improving maintainability. This approach is particularly useful for recurring tasks or complex policies that require multiple conditions.
Packets can be directed to custom chains using the JUMP target, allowing for specialized processing before a final decision is made. For example, a custom chain might log certain traffic types before deciding to drop them, combining visibility with action. This modularity simplifies updates and troubleshooting, as changes can be isolated to specific chains.
The ability to design custom chains underscores IPTables’ adaptability to diverse network environments, making it a versatile tool for various setups. Whether managing a small home server or a large enterprise network, this feature supports the creation of bespoke security logic. A practical demonstration of this concept will be provided in later sections to illustrate its real-world application.
Setting Up the Stage: Preparing for IPTables Demos
To translate theoretical knowledge into practical skills, setting up a controlled environment for testing IPTables rules is a critical step. Virtual machines (VMs) offer a safe and flexible platform to experiment with network configurations without risking live systems, and this section provides detailed guidance on establishing such a setup.
The process involves selecting appropriate virtualization tools and configuring them to simulate a realistic network scenario. By creating distinct server and client VMs, real-world interactions can be replicated, allowing for the observation of how IPTables rules impact traffic. This hands-on approach bridges the gap between concept and application.
Ensuring that the environment is correctly configured is paramount to the success of the demonstrations, as attention to detail during setup prevents unnecessary complications and enables a focus on learning IPTables’ functionality. The following subsections outline the necessary steps to prepare for effective and insightful demos.
Choosing Virtualization Tools: VMware Fusion or Vagrant
Selecting the right virtualization software is the first step toward creating a reliable testing environment, and making an informed choice can significantly impact the efficiency of your setup. VMware Fusion stands as a popular choice for Mac users, offering robust support for various operating systems like Ubuntu. For those on Windows or seeking alternatives, Oracle VirtualBox provides a free and versatile option, though compatibility issues may arise with Apple M-series chips, necessitating VMware Fusion in such cases.
For a more streamlined experience, Vagrant emerges as an excellent tool to automate VM creation and management, leveraging configuration files to ensure consistency across different setups and reducing manual errors. This automation proves especially beneficial for teams or individuals who require reproducible environments for repeated testing, as it saves time and minimizes discrepancies in development or production settings.
Deciding between these tools depends on specific needs and hardware constraints. VMware Fusion excels in performance and integration with Mac systems, while Vagrant prioritizes ease of use and consistency. Both approaches will be detailed to accommodate varying preferences and technical setups, ensuring accessibility for all readers.
Installing and Configuring VMware Fusion
For those opting for VMware Fusion, the installation process begins with downloading the software from the official Broadcom website, which may require registration and providing personal details. Once installed, launching VMware Fusion allows users to create a new virtual machine by selecting the option to install from a disc or image. An Ubuntu ISO image, downloadable from the official Ubuntu site, serves as a suitable choice for this purpose.
After selecting the image, following the on-screen prompts to complete the setup is straightforward, often involving clicking through default options for basic configurations. Customizing settings such as memory allocation or network type can enhance performance, though defaults suffice for initial demos. Ensuring that the VM boots correctly confirms a successful installation, readying the system for further configuration.
Attention to network settings within VMware Fusion is crucial, as it determines how virtual machines (VMs) communicate with each other and external networks. Configuring a private network or NAT mode facilitates isolated testing, mimicking real network scenarios. This preparation ensures that subsequent IPTables rules can be tested effectively, with clear visibility into packet interactions between machines.
Simplifying with Vagrant: Automated VM Setup
Vagrant offers an alternative path by automating much of the VM creation process, making it ideal for those seeking efficiency in their workflow. Installation on a Mac can be achieved via Homebrew with a simple command to install the cask version of Vagrant. For other operating systems, downloading the appropriate installer from the Vagrant website ensures compatibility and ease of setup.
Once installed, initializing a Vagrant project involves creating a directory and running commands to set up a Vagrantfile, which defines VM parameters. Installing necessary plugins, such as the VMware Desktop plugin, and the corresponding utility enhances functionality when using VMware as the provider. Executing the command to start the VMs brings the environment online, though permission issues on Mac systems may require running with elevated privileges.
This automated approach minimizes manual intervention, ensuring that configurations remain consistent across different sessions. Troubleshooting common issues, such as granting terminal access for input monitoring on Macs, helps maintain a smooth setup process. With Vagrant, the focus shifts quickly from environment creation to actual testing, accelerating the learning curve for IPTables.
Establishing the Demo Environment: Server and Client VMs
With virtualization tools in place, configuring two VMs—one as a server and the other as a client—sets the stage for practical IPTables testing. Assigning distinct IP addresses, such as 192.168.212.134 for the server and 192.168.212.135 for the client, establishes a clear network topology. These addresses may vary based on the virtualization tool’s network settings, requiring verification after setup.
Accessing these VMs via SSH, either directly using their IP addresses or through Vagrant’s built-in SSH command, enables remote management and rule application. Ensuring that both machines can communicate, perhaps by testing a simple ping, validates the network configuration. This connectivity is essential for observing how IPTables rules affect traffic between the server and client.
Documenting IP assignments and access methods during setup prevents confusion during demonstrations. A well-prepared environment, with both VMs operational and reachable, lays a solid foundation for applying and testing security rules. This setup mirrors real-world scenarios, providing valuable insights into network behavior under controlled conditions.
Hands-On with IPTables: Crafting Rules through Demos
With the demo environment ready, attention turns to applying IPTables rules to observe their impact on network traffic, providing a practical way to understand their effects. These step-by-step demonstrations utilize the server and client VMs to simulate real-world security scenarios. Each exercise builds on the previous one, gradually increasing in complexity to cover essential functionalities.
The focus lies in practical application, translating theoretical concepts into tangible outcomes through hands-on experience. From inspecting default configurations to creating custom processing logic, these demos offer a comprehensive look at managing packet flow and ensuring effective network operations. Clear instructions ensure that each step is accessible, even to those new to network security.
Testing rules in a controlled setting highlights their effects without risking live systems, fostering confidence in rule design. Each demonstration includes explanations of expected behaviors and troubleshooting tips for common issues. This hands-on approach solidifies understanding, preparing readers for real-world implementation of IPTables.
Step 1: Inspecting Default IPTables Configuration
Begin by examining the existing IPTables setup on the server VM to understand its baseline state, and execute the command sudo iptables -L -v -n to list all current rules with verbose and numerical output. This reveals the default chains—INPUT, OUTPUT, and FORWARD—along with their policies and any pre-existing rules, providing a snapshot of the system’s initial security posture.
Analyze the output to note the default policy for each chain, often set to ACCEPT, meaning unmatched packets are permitted by default. The columns in the output detail packet counts, byte totals, target actions, protocols, and source or destination addresses. This breakdown offers insight into traffic patterns and existing configurations, which may include additional chains if software like Docker is installed.
Understanding this starting point is crucial before modifying rules, as it establishes a reference for changes and provides a baseline for evaluating the impact of any adjustments. Observing how many packets have already been processed under current policies helps gauge the system’s activity level. This initial inspection serves as a foundation for subsequent rule additions, ensuring informed decision-making.
Decoding Chain Policies and Rules
Delve deeper into the significance of chain policies, such as ACCEPT, which allows all traffic unless explicitly blocked by a rule, and understand its impact on network security. A policy of DROP would have the opposite effect, denying unmatched packets, though this is less common as a default. Recognizing this behavior is key to predicting how new rules will interact with existing settings.
Additional chains or rules in the output, often related to installed applications, highlight how system configurations influence IPTables. For instance, Docker creates specific chains to manage container networking, which may appear alongside built-in chains. Noting these ensures that modifications account for all active components, preventing unintended conflicts.
This detailed analysis of policies and rules equips administrators with the knowledge to tailor security measures effectively. It underscores the importance of reviewing the full IPTables state before making changes, as overlooked elements could impact rule outcomes. Such diligence is a best practice in maintaining network integrity.
Step 2: Blocking Traffic with a DROP Rule
Proceed to implement a rule that blocks specific traffic by adding a DROP action for ICMP (ping) packets from the client VM. On the server, run sudo iptables -A INPUT -s 192.168.212.135 -p icmp -j DROP to append this rule to the INPUT chain. This command targets packets from the specified client IP using the ICMP protocol, silently discarding them.
Test the rule’s effect by initiating a ping from the client to the server, observing that the client’s terminal hangs without a response. This behavior results from the DROP action, which provides no feedback to the sender, leaving it waiting indefinitely or timing out based on its configuration. Verify the rule’s presence with sudo iptables -L -v -n to confirm its application.
This demonstration illustrates a fundamental security technique for blocking unwanted traffic discreetly. It highlights the practical impact of rules on network interactions, showing how easily specific communications can be halted. Such control is vital for protecting systems from persistent or malicious sources without alerting them to the blockade.
Understanding Silent Drops in Packet Handling
Explore why the DROP action results in a silent discard, offering no indication to the sender that their packets were blocked. Unlike rejection mechanisms, DROP simply discards packets at the kernel level, preventing any response from reaching the client. This stealthy approach can be advantageous in avoiding detection by potential attackers.
Interestingly, tools like tcpdump may still capture these packets on the server, as they operate at a lower layer before IPTables rules are applied. Running tcpdump on the server’s interface reveals incoming pings despite the DROP rule, underscoring the distinction between packet capture and filtering. This layered interaction is a critical nuance in understanding network diagnostics.
Recognizing the silent nature of DROP actions informs decisions on when to use them versus more communicative alternatives, while also emphasizing the importance of complementary tools for monitoring. Relying solely on IPTables output might miss underlying traffic patterns, so this insight enhances the ability to design comprehensive security strategies.
Step 3: Rejecting Traffic with a REJECT Rule
Shift to a different approach by implementing a REJECT rule, which actively informs the sender of blocked traffic. On the server, first remove the existing DROP rule to avoid conflicts, then add sudo iptables -A INPUT -s 192.168.212.135 -p icmp -j REJECT. This rule targets the same ICMP packets from the client but sends back an error message, typically an ICMP port unreachable response.
From the client, attempt another ping to the server, noting whether you receive a clear rejection message or an immediate failure rather than a hang. This feedback distinguishes REJECT from DROP, providing transparency to the sender about the blocked attempt. Confirm the rule’s effect by reviewing the IPTables list, ensuring it is correctly positioned and active.
This exercise showcases an alternative method for handling unwanted traffic, balancing security with communication. REJECT rules can deter repeated attempts by signaling that access is denied, which may be particularly useful in less covert scenarios. Understanding these differences allows for strategic rule selection based on specific security goals.
Rule Order Impact: Why Sequence Matters
Grasp the critical importance of rule order in IPTables, as the system applies the first matching rule encountered in a chain, and if the DROP rule from the previous step was not deleted before adding the REJECT rule, the latter would never trigger due to the earlier match. This precedence dictates that careful sequencing is necessary to achieve the desired outcomes.
To manage rules effectively, list them with line numbers using sudo iptables -L INPUT --line-numbers, identifying specific entries for modification or deletion. Remove a rule by its number with sudo iptables -D INPUT , ensuring the correct order is maintained. This process prevents unintended rule overshadowing and preserves the intended policy.
Mastering rule sequencing is a cornerstone of effective IPTables management, as misplaced rules can negate entire security configurations and undermine the intended protection. Regularly reviewing and adjusting rule positions safeguards against logical errors, especially as policies expand. This discipline is essential for maintaining a coherent and functional security framework.
Step 4: Building a Custom Chain for Logging and Action
Advance to creating a custom chain to handle traffic with multiple actions, enhancing modularity by following a structured approach to network management. Start by defining a new chain named CUSTOM_PING with sudo iptables -N CUSTOM_PING. Then, add rules to this chain, such as logging with sudo iptables -A CUSTOM_PING -s 192.168.212.135 -p icmp -j LOG --log-prefix "PING_LOG: " --log-level 4 and dropping with sudo iptables -A CUSTOM_PING -s 192.168.212.135 -p icmp -j DROP.