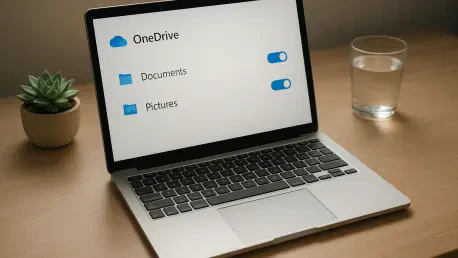

The ability to specify which folders are visible on a PC helps minimize distractions and ensures that only the most necessary files occupy the user’s workspace. As operating systems become increasingly integrated with cloud services, the default tendency of Windows to mirror local directories to the cloud can often lead to a cluttered environment where personal and professional data blend into an unmanageable digital sprawl. In 2026, the reliance on cloud-native workflows has reached a peak, making it imperative for users to understand the mechanics of their storage solutions to prevent unnecessary data consumption or accidental exposure of sensitive information. While automated backups offer a safety net, they frequently bypass the user’s intent, pulling large media libraries or temporary work files into a limited cloud quota without explicit permission. Mastering the nuances of Microsoft OneDrive is no longer just a technical skill for power users but a necessary component of digital hygiene for anyone operating in a modern Windows environment. By taking proactive steps to configure how and when files move to the cloud, individuals can reclaim their local storage capacity and ensure that their synchronization settings align with their actual daily requirements rather than the provider’s default parameters. This transition from passive acceptance of automated settings to active management fosters a more efficient workspace where the distinction between local assets and cloud-stored archives remains clear and purposeful, ultimately reducing the cognitive load associated with file management in a hyper-connected world.
1. Initiating the Configuration through OneDrive Settings
The journey toward a more organized digital environment begins with the OneDrive icon, which is typically found nestled within the Windows taskbar at the bottom right of the screen. This small icon serves as the primary gateway for all synchronization activities and status updates. By clicking on this icon, a pop-up window reveals the current state of file transfers, recently synchronized items, and any potential errors that might be impeding the backup process. To dive deeper into the actual management of these services, one must locate and select the gear icon positioned in the top right corner of this interface. This action opens a secondary menu that provides access to the comprehensive settings suite, where the core behavior of the cloud integration can be modified. It is essential to recognize that this initial step is not merely about clicking buttons but about accessing the control center of the machine’s relationship with external servers. Understanding where these tools reside allows for quick adjustments in the future, especially when sudden changes in internet connectivity or storage limits require immediate intervention.
Once the settings menu is open, the user is presented with a structured interface that categorizes the various functions of the cloud service. This administrative area is where the foundational rules of data handling are established. The interface is designed to provide a centralized location for managing account details, notification preferences, and advanced synchronization logic. In the context of a modern Windows installation, these settings often override general system preferences, making them the definitive source for how personal data is treated. Navigating this menu effectively requires a clear understanding of the difference between purely local files and those that are being mirrored across multiple devices. The gear icon essentially acts as the toggle between a computer that functions as a standalone unit and one that exists as a node in a larger digital network. By accessing these settings, the user takes the first critical step in transitioning from a default, one-size-fits-all configuration to a customized setup that respects their specific workflow and storage limitations. This proactive approach prevents the common frustration of finding that important files have been moved or deleted based on automated algorithms rather than human decision-making.
2. Navigating the Sync and Backup Interface
After entering the main settings environment, the next logical step involves identifying the specific section dedicated to the movement of data between the physical hardware and the cloud. On the left-hand navigation pane, a tab labeled Sync and backup serves as the focal point for these operations. This section is specifically engineered to handle the primary directories that Windows considers vital for most users, including the Desktop, Documents, and Pictures folders. Within this tab, the most prominent feature is the section titled Back up important PC folders to OneDrive. To gain granular control over which of these directories are actually being sent to Microsoft’s servers, the Manage backup button must be selected. This action triggers the opening of a dedicated management window that details the current backup status of each high-level folder. It is here that the system reveals exactly how much data is being protected and, conversely, how much of the cloud quota is being consumed by these automated processes.
Understanding the layout of the Sync and backup tab is vital because it represents the bridge between the operating system’s local file structure and the external storage environment. The Manage backup interface provides a visual representation of the data footprint, allowing users to see at a glance which folders are prioritized. This level of transparency is necessary for maintaining a lean system, as it prevents the silent accumulation of gigabytes of data that may not actually require cloud protection. Furthermore, this section often contains additional options for optimizing upload speeds or managing how the system behaves when the battery is low or when a metered connection is detected. By spending time in this specific sub-menu, one gains a deeper appreciation for the underlying architecture of modern file management. It ensures that the backup strategy is not a “black box” operation but a transparent process that can be audited and adjusted as personal or professional needs evolve. This stage of the process is where the heavy lifting of data organization truly begins, setting the stage for more specific folder-level decisions.
3. Exercising Granular Control over Folder Synchronization
Inside the Manage backup window, the interface presents a series of toggles for individual system folders, such as Documents, Pictures, Desktop, Music, and Videos. Each of these folders can be independently included in or excluded from the automated synchronization process. Turning off these switches is the most effective way to stop the service from automatically uploading large amounts of data, which can often saturate internet bandwidth and fill up storage quotas prematurely. For instance, a folder containing high-resolution video projects might be better kept strictly local to avoid long sync times and high data usage. By toggling these switches to the off position, the user instructs the system to treat these directories as traditional local storage, detached from the cloud-mirroring engine. This does not mean the files are deleted; rather, it changes their status so they no longer rely on a server-side copy for their existence. This level of control is particularly beneficial for those who work with sensitive data that they prefer not to store on third-party servers or for those who operate in environments with limited or expensive internet access.
The implications of toggling these switches extend beyond simple storage management; it also impacts how the Windows shell interacts with the user’s files. When a folder is synced, the operating system often replaces local icons with cloud-aware placeholders, which can sometimes lead to confusion if the internet connection is unstable. By opting out of synchronization for specific folders, the user ensures that the file paths remain consistent and that all data is physically present on the hard drive at all times. This eliminates the “downloading” delay often experienced when trying to access a file that has been offloaded to the cloud to save space. Moreover, managing these toggles prevents the accidental synchronization of temporary files or cache directories that some applications might store within the Documents folder. This selective approach allows for a much cleaner backup profile, where the cloud storage is reserved for truly essential documents while the local machine handles the heavy lifting of media-rich or transient data. It represents a shift towards a more intentional use of technology, where the user defines the boundaries of their digital footprint.
4. Managing Visibility and Local Storage Footprint
Once the high-level backup settings have been established, a more refined level of control can be found within the Account tab of the settings menu. This area focuses on the Choose folders functionality, which determines which of the existing cloud-stored folders should actually appear within the local File Explorer. When the Choose folders button is clicked, a comprehensive list of all directories stored in the OneDrive account is displayed. By unchecking specific boxes, a user can hide entire folders from their local machine without deleting them from the cloud. This is an excellent way to reduce visual clutter and save disk space, especially on devices with limited internal storage like laptops or tablets. The files remain safely archived on the server and can be accessed via a web browser at any time, but they no longer occupy space or appear as “placeholder” icons in the local directory structure. This feature is particularly useful for archiving old projects or keeping personal photo libraries accessible but out of sight on a primary work computer.
This process of selective visibility is a cornerstone of efficient digital workspace management. It allows for a customized view of one’s digital life that changes depending on the device being used. For example, a primary desktop might show all folders for maximum access, while a mobile workstation might only display current projects to preserve local storage. Unchecking folders in this menu effectively “offloads” the local management of those files, instructing Windows to ignore them during routine synchronization cycles. This also has the added benefit of speeding up the File Explorer, as the system no longer needs to index or track the status of thousands of remote files. It is important to distinguish this from the “Files On-Demand” feature; while placeholders still exist for folders that are checked, unchecking them entirely removes the entry from the local file tree. This method provides the ultimate level of decluttering, ensuring that the local file system remains a lean, focused environment containing only the data necessary for current tasks.
5. Validating Synchronization Integrity with Practical Testing
Before finalizing any major changes to a backup configuration, it is highly recommended to perform a controlled validation test to confirm how the system handles file operations. This is best achieved by creating a basic, non-essential text document, perhaps named Test.txt, and placing it within a folder that is actively being synchronized. By observing how this file interacts with the cloud service—noting the status icons as they change from a “syncing” state to a “cloud” or “local” state—the user can gain a practical understanding of the underlying logic. Once the file has successfully uploaded, the next step in the test involves deleting the file from the local machine and then attempting to restore it through the OneDrive Recycle Bin. This exercise is crucial because it demystifies the recovery process, providing the confidence needed to manage important data without the fear of accidental loss. It also clarifies whether the system is set to “online-only” or if it maintains a full local copy, which is a vital distinction when working offline.
Furthermore, practicing the restoration of a test file highlights the safety net provided by version history and the digital trash can. In many cases, users are unaware that deleted cloud files are often held in a secondary retention area for a set period, providing a final chance to undo mistakes. By intentionally walking through these steps, one can verify that the synchronization and Recycle Bin behaviors match their expectations. This testing phase also provides an opportunity to observe the speed of the synchronization process and the impact on system resources. If the test file takes an unusually long time to sync or if the system becomes sluggish, it may indicate that the background settings need further optimization, such as adjusting upload rate limits. Validating the workflow in this manner ensures that when a real-world data emergency occurs, the steps required to resolve it are already familiar and well-understood. It transforms an abstract technical process into a concrete set of manageable actions, reinforcing the user’s control over their digital assets.
6. Implementing Robust Data Protection Strategies
Taking control of cloud synchronization settings was the first step toward a more secure and organized digital life, but it should not be the final word in data protection. A truly resilient strategy relies on the principle of redundancy, often referred to as the Rule of Three. This guideline suggests that an individual should maintain three separate copies of their most vital information, stored on at least two different types of media, with one of those copies kept at an off-site or cloud-based location. While OneDrive serves as an excellent off-site component, it is susceptible to account lockouts, service outages, or accidental synchronization errors that could propagate a deletion across all connected devices. Therefore, supplementing cloud backups with a physical external hard drive or a secondary network-attached storage device was the best way to ensure total data sovereignty. This multi-layered approach guarantees that even if one system fails, the data remains intact and accessible through alternative means.
In addition to redundancy, managing the way files are uploaded can provide an extra layer of security and organization. For documents that do not require constant updates, utilizing the manual upload feature via the web interface or the dedicated mobile app was a superior method for long-term storage. This approach bypassed the automated synchronization engine entirely, preventing local changes from affecting the “master” copy in the cloud. It acted as a manual archive, perfect for finalized projects or historical records that only needed to be accessed occasionally. Moving forward, users should regularly audit their folder selections and backup toggles to ensure they still align with their current storage needs and privacy preferences. As digital environments continue to evolve, the ability to pivot between automated convenience and manual control will remain the most effective tool for safeguarding information. By staying informed and proactive, the risks associated with data loss were significantly mitigated, allowing for a more focused and productive relationship with technology.