
Transitioning microservices from simpler container orchestration systems to the robust, feature-rich environment of Kubernetes often presents a significant operational challenge, demanding a solution that balances power with manageability. This article details a comprehensive, production-ready architecture that rises to this challenge by deploying a containerized Quarkus application on AWS Elastic Kubernetes Service (EKS) with Fargate. By leveraging the AWS Cloud Development Kit (CDK) for Infrastructure as Code (IaC), this approach not only automates the provisioning of complex cloud infrastructure but also integrates a complete CI/CD pipeline using native AWS services. The result is a scalable, serverless, and automated workflow that streamlines development from code commit to production deployment, offering a powerful blueprint for modern cloud-native applications. This guide moves beyond theoretical concepts to provide a practical implementation, demonstrating how to harness the combined strengths of Kubernetes orchestration and serverless compute to build resilient and efficient systems.
1. A Blueprint for Production Ready Architecture
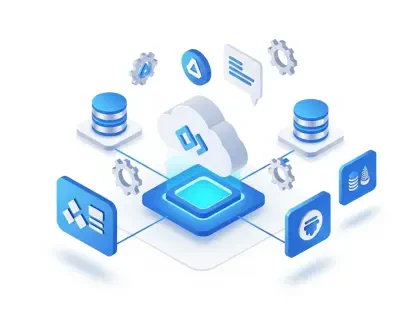
The architecture presented here is a multi-layered, production-grade system designed for high availability and operational efficiency. At the top, the presentation layer consists of a Quarkus REST API, complete with OpenAPI and Swagger for clear documentation and interaction, handling the customer management interface. Beneath this lies the application layer, where the business logic is implemented using Quarkus Panache, a library that simplifies data access and entity management. The persistence needs are met by the data layer, which utilizes a combination of AWS RDS with PostgreSQL for structured relational data and ElastiCache with Redis for high-speed caching, ensuring both data integrity and performance. The core of the infrastructure is the container orchestration layer, which employs AWS EKS to manage the containerized workloads. A key decision in this architecture is the use of Fargate as the serverless compute engine for EKS. Fargate abstracts away the underlying server infrastructure, eliminating the need to provision, patch, or manage EC2 instances for the worker nodes. This serverless model provides automatic scaling and is an excellent fit for continuously running applications like the Quarkus API, offering the operational simplicity of a serverless platform while retaining the power and portability of the Kubernetes ecosystem. The entire infrastructure, from networking to databases and the EKS cluster itself, is defined and managed using AWS CDK, enabling a repeatable and version-controlled approach to infrastructure provisioning. Finally, a fully automated CI/CD pipeline, built with AWS CodePipeline and CodeBuild and integrated with GitHub, orchestrates the entire process from source code changes to deployment on the EKS cluster.
2. Establishing the Foundational CDK Stacks
The Infrastructure as Code is methodically organized into distinct CDK stacks, each handling a specific component of the overall architecture to ensure modularity and maintainability. The foundational element is the VpcStack, which provisions the networking infrastructure. This stack creates a Virtual Private Cloud (VPC) configured for high availability by spanning multiple Availability Zones. Within this VPC, it establishes both public and private subnets. The public subnets are connected to an Internet Gateway, allowing inbound traffic to reach resources like a Network Load Balancer. Conversely, the private subnets, where the core application components like EKS Fargate pods and the RDS database reside, are connected to a NAT Gateway. This configuration permits resources in the private subnets to initiate outbound connections to the internet for tasks like software updates while blocking unsolicited inbound traffic, significantly enhancing security. Although using an AWS account’s default VPC is an option, creating a dedicated VPC provides superior isolation, allows for customized network address ranges (CIDR blocks), and offers more granular control over the network topology, which are all critical considerations for a production environment. This carefully designed network serves as the secure and isolated foundation upon which all other infrastructure components are built, ensuring a robust and secure operational environment from the ground up.
Building upon the network foundation, the EKS Cluster Stack is the core infrastructure component responsible for creating and configuring the Kubernetes cluster. This stack provisions an EKS cluster, specifying a recent Kubernetes version and enabling public endpoint access for management purposes while deploying the cluster itself within the secure private subnets of the VPC. A crucial part of this stack is the creation of a Fargate profile. This profile is configured to target a specific Kubernetes namespace, in this case, customer-service, which instructs EKS to run any pods deployed into that namespace on the Fargate serverless compute engine. The profile also defines a pod execution role with the necessary IAM permissions, such as CloudWatch Logs access for centralized logging. To enable secure interaction with other AWS services, the stack sets up a Kubernetes ServiceAccount that leverages IAM Roles for Service Accounts (IRSA). This mechanism allows pods to assume an IAM role without embedding static credentials, granting them secure, temporary access to services like RDS and AWS Secrets Manager. Finally, the stack programmatically creates Kubernetes manifests for the namespace, a ConfigMap containing database and Redis connection details, and the deployment and service resources, loading these configurations from YAML files. It intelligently establishes dependencies between these resources, ensuring they are created in the correct order to prevent race conditions and deployment failures.
3. Automating Deployments with a Native CI CD Pipeline
A complete CI/CD pipeline, implemented as its own CDK stack, automates the entire build and deployment lifecycle using native AWS services. The pipeline is divided into three distinct stages, beginning with the Source Stage. This stage integrates directly with a GitHub repository using a webhook trigger. When a developer pushes new code to the designated branch, the webhook notifies AWS CodePipeline, which automatically initiates a new pipeline execution. To access the source code, the pipeline securely retrieves a GitHub OAuth token that is stored in AWS Secrets Manager, avoiding the insecure practice of hardcoding credentials. The second stage is the Build Stage, which is handled by AWS CodeBuild. This stage uses a pre-configured build environment, such as a standard Linux image with Java and Docker, to compile the Quarkus application. A key tool in this process is the JIB Maven plugin, which efficiently builds a Docker container image without requiring a Docker daemon, and then pushes this image to a repository in Amazon Elastic Container Registry (ECR). The CodeBuild project is configured with privileged mode enabled to perform Docker-related operations and is granted the necessary IAM permissions to authenticate and push images to ECR, ensuring a seamless and secure build process.
The final phase of the automation is the Deploy Stage, which is executed by a separate AWS CodeBuild project specifically designed for interacting with the EKS cluster. This stage begins by updating its local .kube/config file with the connection details and credentials required to access the newly provisioned EKS cluster. It then assumes an IAM role that has been granted administrative permissions on the EKS cluster, allowing it to apply changes. Using kubectl, the CodeBuild project applies the updated Kubernetes manifests, which now reference the new container image version pushed to ECR in the previous stage. This action triggers a rolling update in Kubernetes, gracefully replacing the old application pods with the new ones without causing downtime. The entire pipeline’s configuration, including repository names, build environments, and IAM roles, is externalized through a CiCdConfig interface that uses MicroProfile Config, making the pipeline highly configurable and adaptable to different environments. Build specifications for both the build and deploy stages are defined in external buildspec.yaml files, further separating configuration from logic. Artifacts generated in one stage, such as the compiled code or build manifests, are stored in an S3 bucket, allowing them to be passed securely and efficiently to subsequent stages of the pipeline.
4. Implementing and Verifying the Solution
The project offers two distinct modes for building, deploying, and testing the application, catering to both local development and full-scale production validation. The development mode is designed for a rapid feedback loop and relies on a local Kubernetes cluster provided by Minikube. This workflow is orchestrated through a local Maven profile, which automates the entire process. Activating this profile triggers a series of executions: it first starts the Minikube cluster, then runs a deployment script, and finally stops the cluster after the session. The core of this process is the deploy-to-minikube.sh script, which performs several critical operations. It begins by loading the locally built Docker image into Minikube’s internal Docker registry. Next, it uses kubectl to create the required customer-service namespace and applies the Kubernetes manifests for both the application and its dependencies, such as PostgreSQL and Redis, which are defined in separate YAML files. Once the script verifies that all services are running, it automatically starts a port-forwarding process, mapping a local port to the application’s service port within the cluster. This allows developers to immediately access the running API through their local machine, for instance, by opening the Swagger UI in a browser at a localhost address. This streamlined local setup is invaluable for testing changes quickly without the time and cost associated with deploying to a full cloud environment.
In contrast, the production mode targets a real AWS infrastructure and provides a true end-to-end test of the entire system. This process is initiated using the e2e Maven profile, which executes the deploy-to-aws.sh script. This script orchestrates a much more complex and lengthy deployment. Its first step is to run a shared script that pushes the newly built container image to the Amazon ECR repository. Following that, it executes the cdk deploy command, which triggers AWS CloudFormation to provision all the defined resources—the VPC, EKS cluster, RDS database, and CI/CD pipeline. This infrastructure provisioning can take a significant amount of time, often 15-20 minutes, depending on the complexity and network conditions. Once the AWS infrastructure is active, the script updates the local .kube/config file to enable kubectl to communicate with the new EKS cluster. It then performs several post-deployment configurations, such as granting necessary IAM permissions to the current user and creating a Kubernetes secret to hold the RDS database password, which it retrieves securely from AWS Secrets Manager. After confirming that all pods are running and healthy, the script provides instructions for testing. Developers can run automated end-to-end tests or use provided helper scripts to start port-forwarding for manual testing with the Swagger UI, run performance demonstrations, and monitor pod status. Critically, scripts are also provided to cleanly destroy all created cloud resources, preventing unintended costs after testing is complete.
5. Essential Troubleshooting for a Complex Environment
Operating a complex, multi-service environment on AWS requires a robust troubleshooting strategy, as issues can arise at any layer, from networking to the CI/CD pipeline. For the core EKS cluster and application deployment, kubectl is the indispensable tool for diagnostics. Verifying the overall cluster status and node health provides a baseline, while commands like kubectl get pods -n customer-service can quickly reveal if application pods are running, pending, or in an error state. If pods are failing to start, kubectl describe pod offers a wealth of information, including recent events that might indicate problems like image pull errors, resource limitations, or failing health checks. Viewing logs with kubectl logs is essential for debugging application-level issues. Beyond the pods, it is critical to verify that Kubernetes services and deployments are correctly configured. For instance, checking the deployment status ensures that the desired number of replicas are running, while inspecting the service can confirm that it is correctly pointing to the application pods. On the AWS side, verifying the existence of the ECR repository and ensuring the IAM roles associated with the EKS cluster and Fargate pods have the correct permissions are common troubleshooting steps. A frequent source of error is misconfigured security groups or network ACLs that might be blocking communication between the EKS pods and the RDS database, which can be diagnosed by checking the networking rules in the AWS Console.
Diagnosing problems within the automated CI/CD pipeline requires a different set of tools and checks, focusing on the AWS developer services. The first step is to verify the pipeline’s execution status in the AWS CodePipeline console, which provides a visual representation of each stage and indicates where a failure occurred. If the source stage fails, the issue often lies with the GitHub webhook configuration or the validity of the OAuth token stored in AWS Secrets Manager. For failures in the build or deploy stages, the primary diagnostic tool is the logs generated by AWS CodeBuild. These logs provide a detailed, command-by-command output of the build process, making it possible to identify compilation errors, test failures, or issues with Docker image creation. A common problem in the build stage is insufficient IAM permissions for the CodeBuild service role, which might prevent it from pushing the container image to ECR. Similarly, in the deploy stage, failures often stem from the CodeBuild role lacking the necessary permissions to interact with the EKS cluster. Verifying that the deployer role has been correctly mapped in the EKS cluster’s aws-auth ConfigMap and has the required AmazonEKSClusterAdminPolicy is a crucial step. By systematically examining the pipeline’s execution history and diving into the detailed logs of each component, developers can efficiently pinpoint and resolve issues, ensuring the automation remains reliable and effective.
Navigating Future Deployments
This project successfully demonstrated a robust and production-ready method for deploying containerized Quarkus applications on AWS EKS with Fargate. The architecture established a powerful pattern by strategically combining the advanced orchestration capabilities of Kubernetes with the operational simplicity afforded by serverless compute, effectively removing the burden of managing underlying server infrastructure. A pivotal element of this success was the adoption of Infrastructure as Code through the AWS CDK, which transformed the complex and error-prone task of provisioning cloud resources into a repeatable, version-controlled, and automated process. The implementation was further enhanced by a fully integrated CI/CD pipeline built with native AWS services, which provided the final, critical piece for achieving consistent, reliable, and automated deployments from code commit to production. This comprehensive approach delivered a solid foundation for building and operating modern microservices on AWS, setting a high standard for future cloud-native development endeavors. The combination of these technologies provided a clear path to achieving both development velocity and operational excellence at scale.