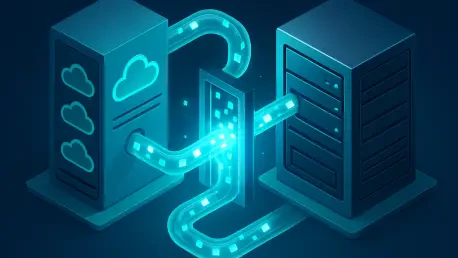

Transitioning a “vibe-coded” prototype into a production-grade enterprise application requires more than just moving files; it demands a strategic architectural shift. Vijay Raina, an expert in SaaS technology and software design, specializes in helping organizations navigate these critical migrations. With extensive experience in enterprise software architecture, Vijay understands the nuances of moving from shared cloud environments like Lovable to robust, scalable platforms like Supabase. His insights bridge the gap between rapid prototyping and long-term technical sustainability, ensuring that data integrity and security remain uncompromised during the transition.
In this discussion, we explore the technical rigors of database migration, focusing on the preservation of user authentication data, the automation of security policies, and the management of complex relational dependencies. Vijay breaks down the process into actionable steps, from the initial code sync to the final verification of a live production environment.
When moving a project from a shared cloud environment to a dedicated instance, how do you manage code integrity during the GitHub sync? Please walk through the specific steps to ensure your local environment perfectly mirrors the prototype’s logic before you begin the migration.
The transition begins with establishing a reliable bridge between the prototype environment and your local machine, which is why the GitHub sync feature in Lovable is so essential. You start by connecting your GitHub account and initiating a sync, which effectively exports the entire logic of the “SpendSmart” application or any other prototype you’ve built. Once the repository is populated, I perform a local clone using the standard git command line to bring those files onto my development machine. At this stage, it is vital to verify that the local repository contains the pre-exported Supabase database schema and Row-Level Security policies that Lovable generates automatically. I always double-check that the file structure is intact before installing dependencies via npm, as this ensures the local environment is a 100% faithful replica of the cloud-hosted logic.
Initializing a new database requires careful handling of schema and Row-Level Security (RLS) policies. How do you automate the deployment of these policies using command-line tools, and what precautions do you take when updating sensitive environment variables like publishable keys and project URLs?
To automate the setup, I rely on the Supabase CLI, starting with a simple installation using npm install supabase --save-dev followed by a secure login and linking process. The heavy lifting is done by the npx supabase db push command, which pushes the schema and RLS policies directly to the new project, ensuring that the 500 MB database is configured exactly like the original. When it comes to environment variables, precision is non-negotiable, so I manually update the .env file with the new Project ID, URL, and Publishable Key retrieved from the Supabase dashboard. To avoid accidental leaks or misconfigurations, I treat these three variables as the “nervous system” of the app, verifying each string against the browser view before saving. This step is the crucial link that redirects the application’s front-end logic from the old shared instance to your new, dedicated infrastructure.
Migrating authentication data requires preserving original IDs and password hashes to avoid breaking foreign keys. How do you structure a script to import these users via an admin API, and what measures prevent the system from accidentally sending confirmation emails to your entire user base?
Migrating users is perhaps the most sensitive part of the process because you cannot afford to break existing relational links or reset user passwords. I use a Node.js script that leverages the @supabase/supabase-js library to interface with the auth.admin.createUser API, specifically mapping the id from the source CSV to the new database to maintain foreign key integrity. Within the script, I explicitly set the email_confirm property to true for every user, which is a critical safety measure that prevents the system from triggering thousands of “confirm your email” notifications. To get the data out of the source, I run a specific SQL query against the auth.users table to grab the email, encrypted_password, and raw_user_meta_data, then feed that CSV into the script. This method ensures that the original password hashes are injected directly into the new system, allowing users to log in with their existing credentials without any friction.
Relational data migration often involves complex dependencies between tables. What is your preferred workflow for handling foreign key constraints when importing bulk CSV data, and how do specialized tools help automate the mapping of schema names and table structures?
For complex relational data, I move away from manual scripting and use specialized tools like Dsync, which dramatically simplifies the import of multiple tables. The workflow involves exporting each table from the Lovable UI as a CSV, then organizing them into a specific folder structure, such as /tmp/love-export/public/, where the subfolder name tells the tool which schema to use. Dsync is particularly powerful because it handles the ordering of data imports automatically, so you don’t have to worry about a “child” table being imported before its “parent” table, which would normally trigger a foreign key violation. I run the dsync --mode InitialSync command with my new PostgreSQL connection string, and it maps the filenames—once renamed to match the table names—directly to the database structure. This automation reduces the migration time from hours of manual SQL writing to just a few minutes of command-line execution.
Maintaining data integrity is critical when an application is serving live traffic. At what specific point in the migration process should a developer take the application offline, and what verification checks do you perform to confirm the new production database is fully populated and functional?
You must take the application offline—specifically by un-publishing it in the project settings—the moment you are ready to begin migrating the actual database records in steps 6 and 7. Doing this prevents users from creating new data on the old instance while you are moving records to the new one, which would result in a “split-brain” scenario and data loss. Once the Dsync command finishes and the script reports the migration is complete, I perform a visual and structural audit of the tables within the Supabase dashboard to confirm the row counts match the source. Finally, I launch the project locally and attempt to authenticate with an existing user account to ensure that the “SpendSmart” analytics and personal transactions are pulling through correctly. Only after I’ve verified that the row-level security is successfully blocking unauthorized access do I consider the new production environment ready for traffic.
Do you have any advice for our readers?
My advice is to never view a prototype as a “final” product, but rather as a blueprint that requires a disciplined migration strategy to become enterprise-ready. Always prioritize the preservation of original IDs during your migration, as recreating user accounts from scratch is a fast way to destroy the relational integrity of your entire database. Take the time to master command-line tools like the Supabase CLI and Dsync early on, because these tools provide a level of repeatability and safety that manual UI exports can never match. Finally, remember that the most successful migrations are the ones where the users never notice a change; if you can move your entire backend without a single person needing to reset their password, you have succeeded as an architect.